ICF Design & Installation
A guide to building a house with ICF
The single most important way of ensuring that an ICF project is built without hassle at lowest cost, is to commission a Structural Engineer, with detailed knowledge and experience of ICF.
On every project, it is necessary to consider the concrete pour heights, floor types, direction of span and the floor connection system on a holistic basis to ensure that the overall construction cost is minimised.
Installation of the First Course.
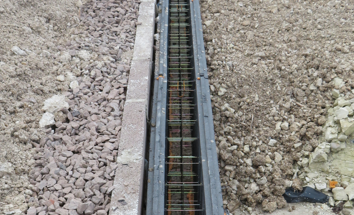
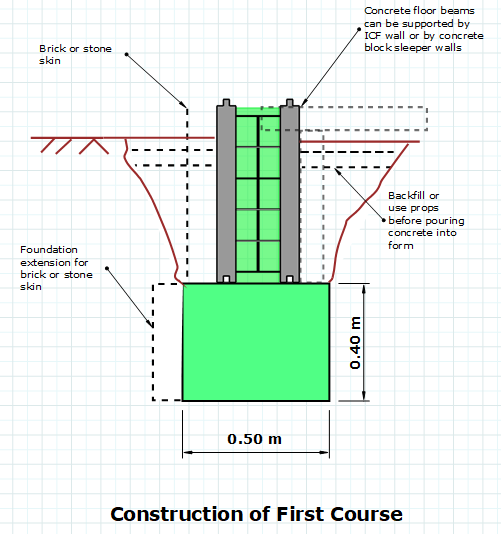
Homes built with concrete ICF forms like PolyBloks do not require heavy foundations because of the stiffness of the walls and their resistance to cracking. As a result, most icf building projects will only require a conventional footing 1m deep with a 400mm deep unreinforced concrete footing in most types of ground.
The first course of ICF PolyBloks can be installed as illustrated here. The ICF building blocks can be propped from the sides of the trench or the trench can be backfilled before concreting as shown here.
Ground Floor Walls.
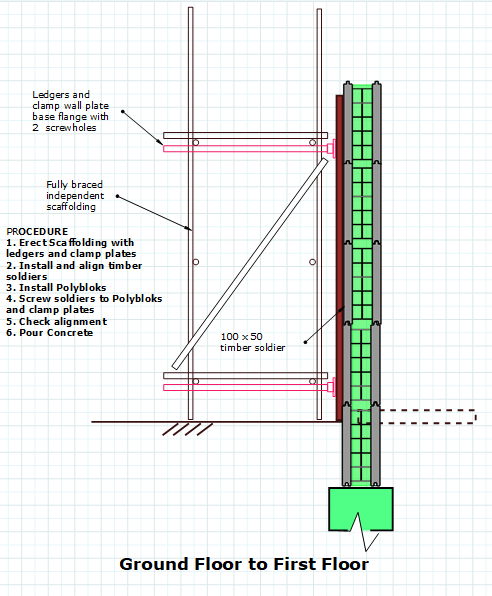
After the first course of PolyBlok ICF has been concreted and backfilled, the first lift of scaffolding should be installed. This must be designed as an independent scaffold that does not rely on the ground floor walls for any support.
Our installation manual shows how scaffolding can be used to brace the icf building forms during concreting and provide a completely safe concreting access platform.
Many ICF installation systems rely on temporary propping systems that are potentially unsafe for inexperienced users and may not comply with the HSE rules for working platforms. They incorporate screw jack systems to adjust the alignment of the concrete ICF forms and also provide an access platform for concreting. The drawbacks of this approach are obvious. If the propping system is not set up perfectly, any movement under the load applied by the concreting team will impact on the alignment of the wall. Furthermore, dragging heavy hoses around that are full of concrete should only be carried out on a working platform that fully complies with the scaffolding standards for safety rails and toeboards etc.
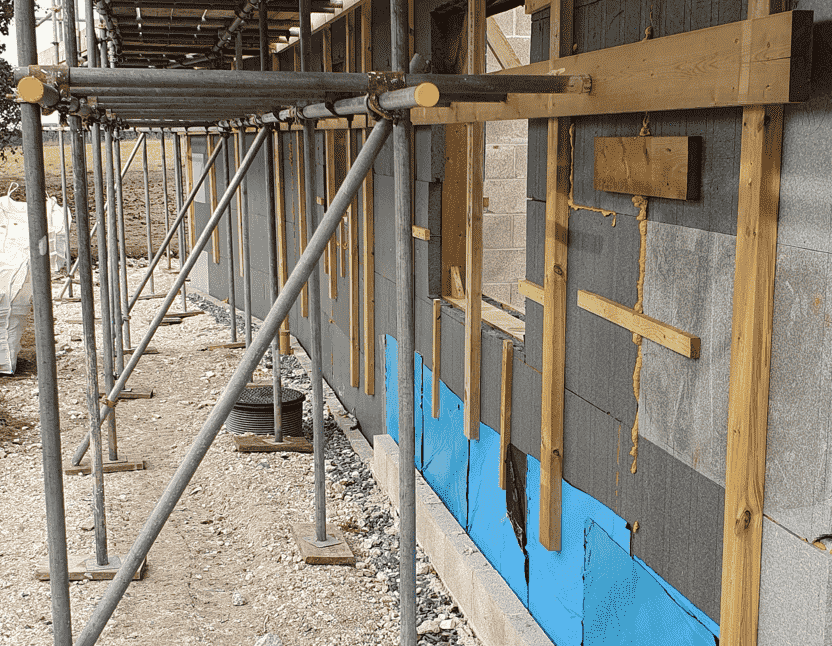
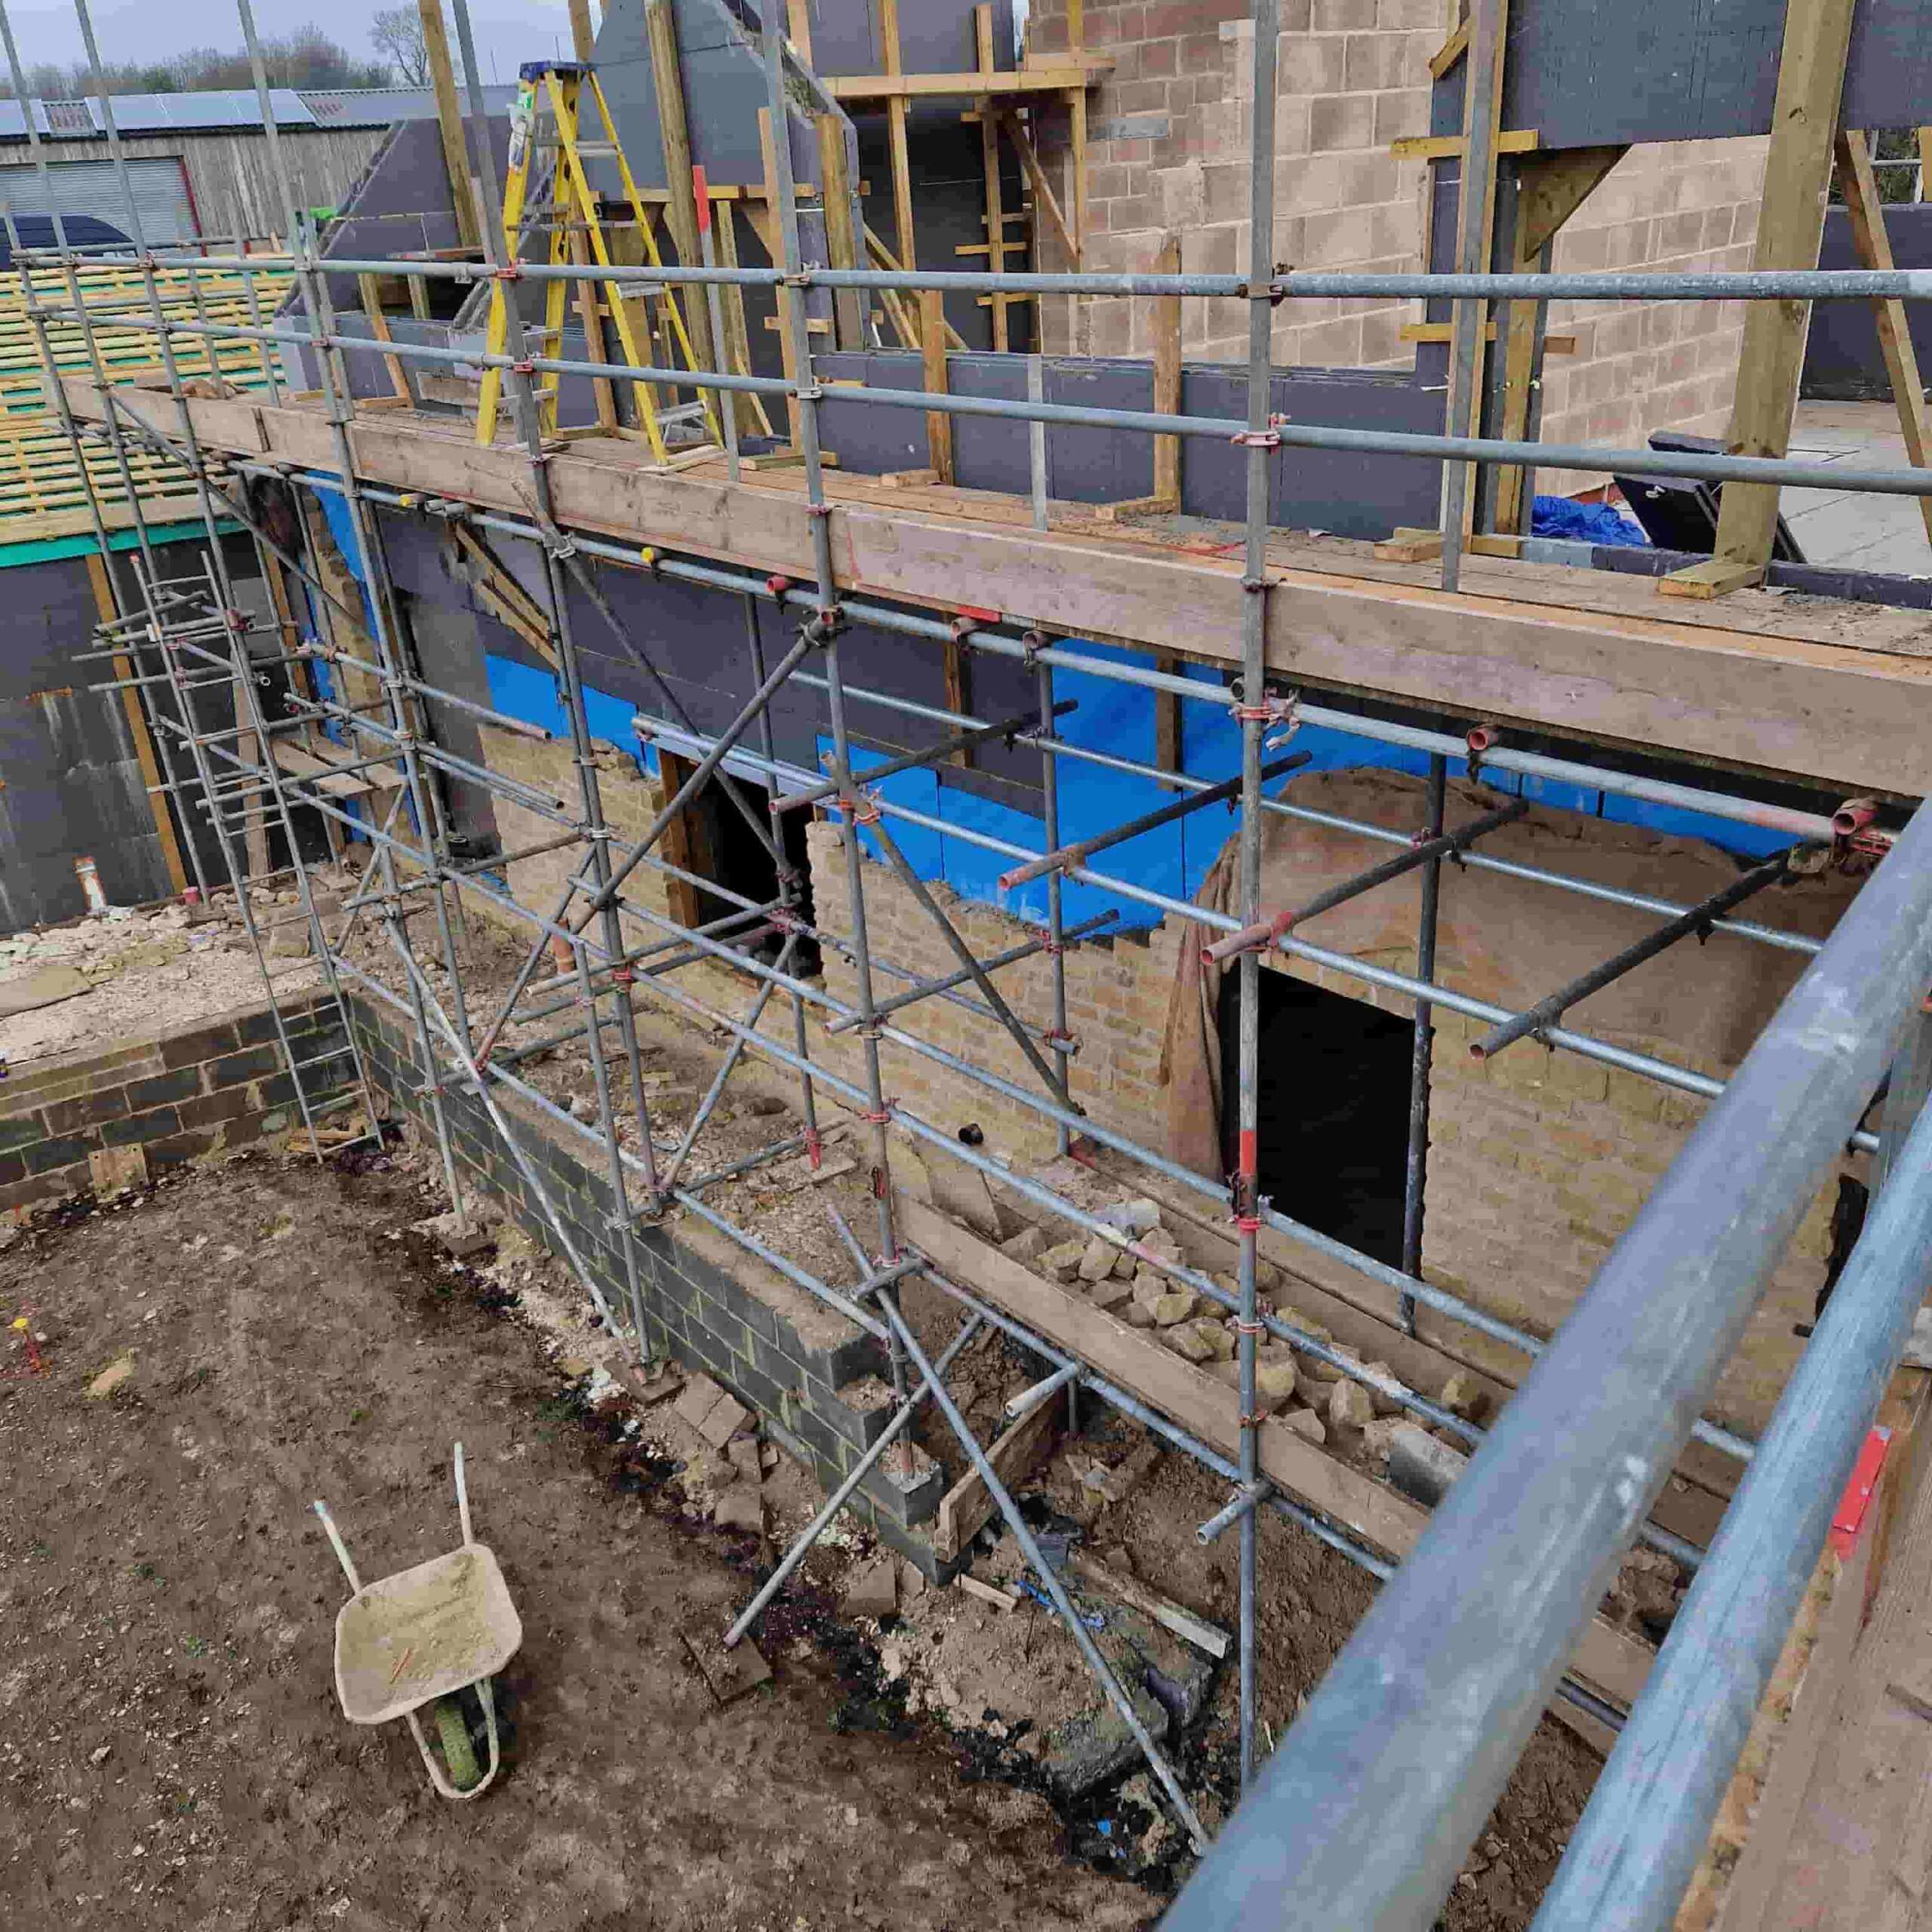
Alternatively, the scaffolding can be used just as a prop on the outside of the wall with timber bracing on the other side that holds the ICF building wall against the scaffolding as shown on this picture.
Some of the walls in this house will have backfilling against them and that is why the DPM has been installed.
First Floor Support.
Option 1: Joist Hangers
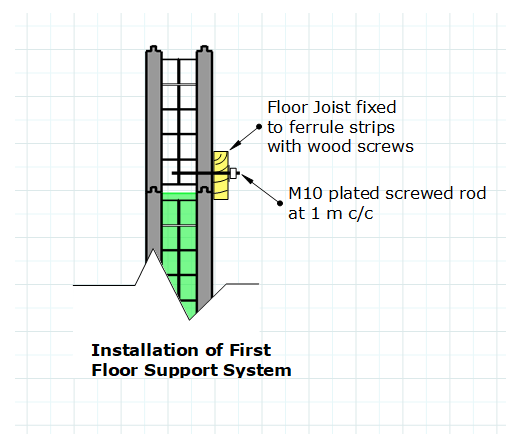
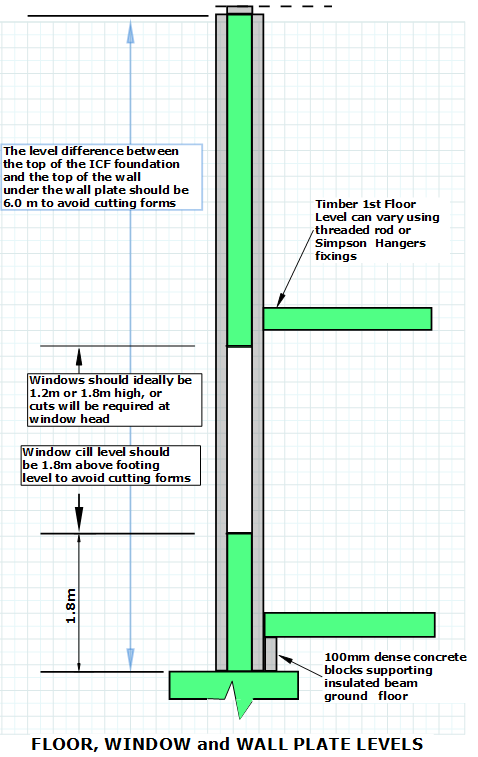
The first floor can be supported as demonstrated here. The joists should be installed before the second lift of concrete is poured. It is also possible to install the floor joists using joist hangers prior to concreting since their weight can be carried by the ferrule strips in the ICF building forms. Obviously it is essential that the bolts are fully tightened after the concrete in the ICF wall has cured. They must also be designed to take account of the floor span, loading on the floor and the eccentricity of the loading because the timber is 65mm away from the concrete core supporting the bolts.
Option 2: Simpson ICF Hangers
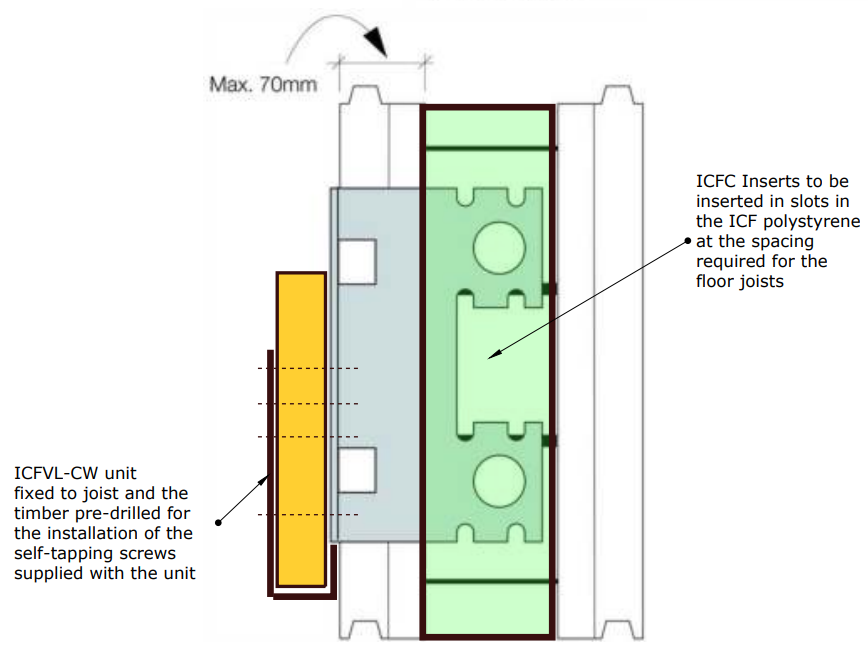
Alternatively, the ICFLC and ICFVL-CW ledger connectors can be used for steel or wood ledgers when the loading is higher. The perforations are designed to allow the concrete to flow around it and anchor the hanger securely within the ICF wall. The exposed flange is then used for fixing the ledger.
First Floor to Eaves.
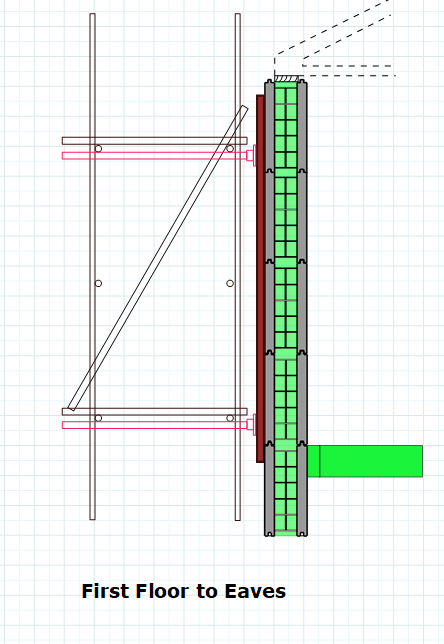
Once the ground floor lift has been poured, the scaffolding should be extended up to the top of the first floor. This provides a safe working platform for concreting the second lift and reduces the risk of anyone falling from the first floor. The ICF wall can then be filled with concrete up to eaves level.
Wall Openings.
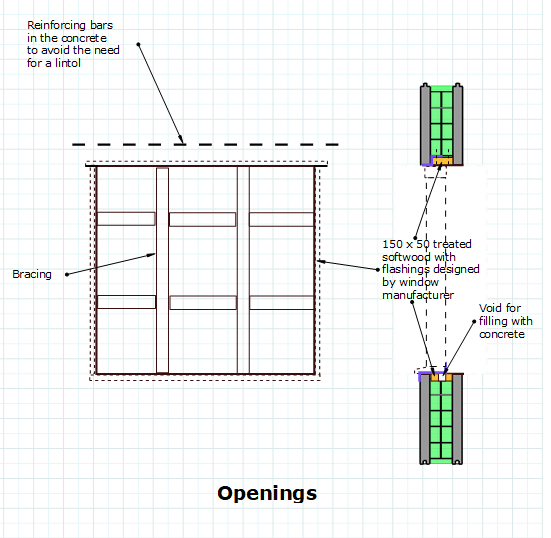
ICF installation with our PolyBloks is simple and quick once your team starts to use it. However, window and door openings usually take the most time to complete. To some extent, this can be helped if the window cill levels are placed at the top of a course of ICF Polyblok so that the only horizontal cutting is at the head of the window. If the windows are made 1200m high the cutting is reduced to needing only the easy vertical cuts.
Horizontal cutting is more difficult because the ferrule strips have to be cut. This can be carried out with a reciprocating saw with a metal cutting blade. If horizontal guidance battens are screwed to the ferrule strips it is easy to achieve a straight cut. Vertical cuts in the EPS are easily carried out with a handsaw.
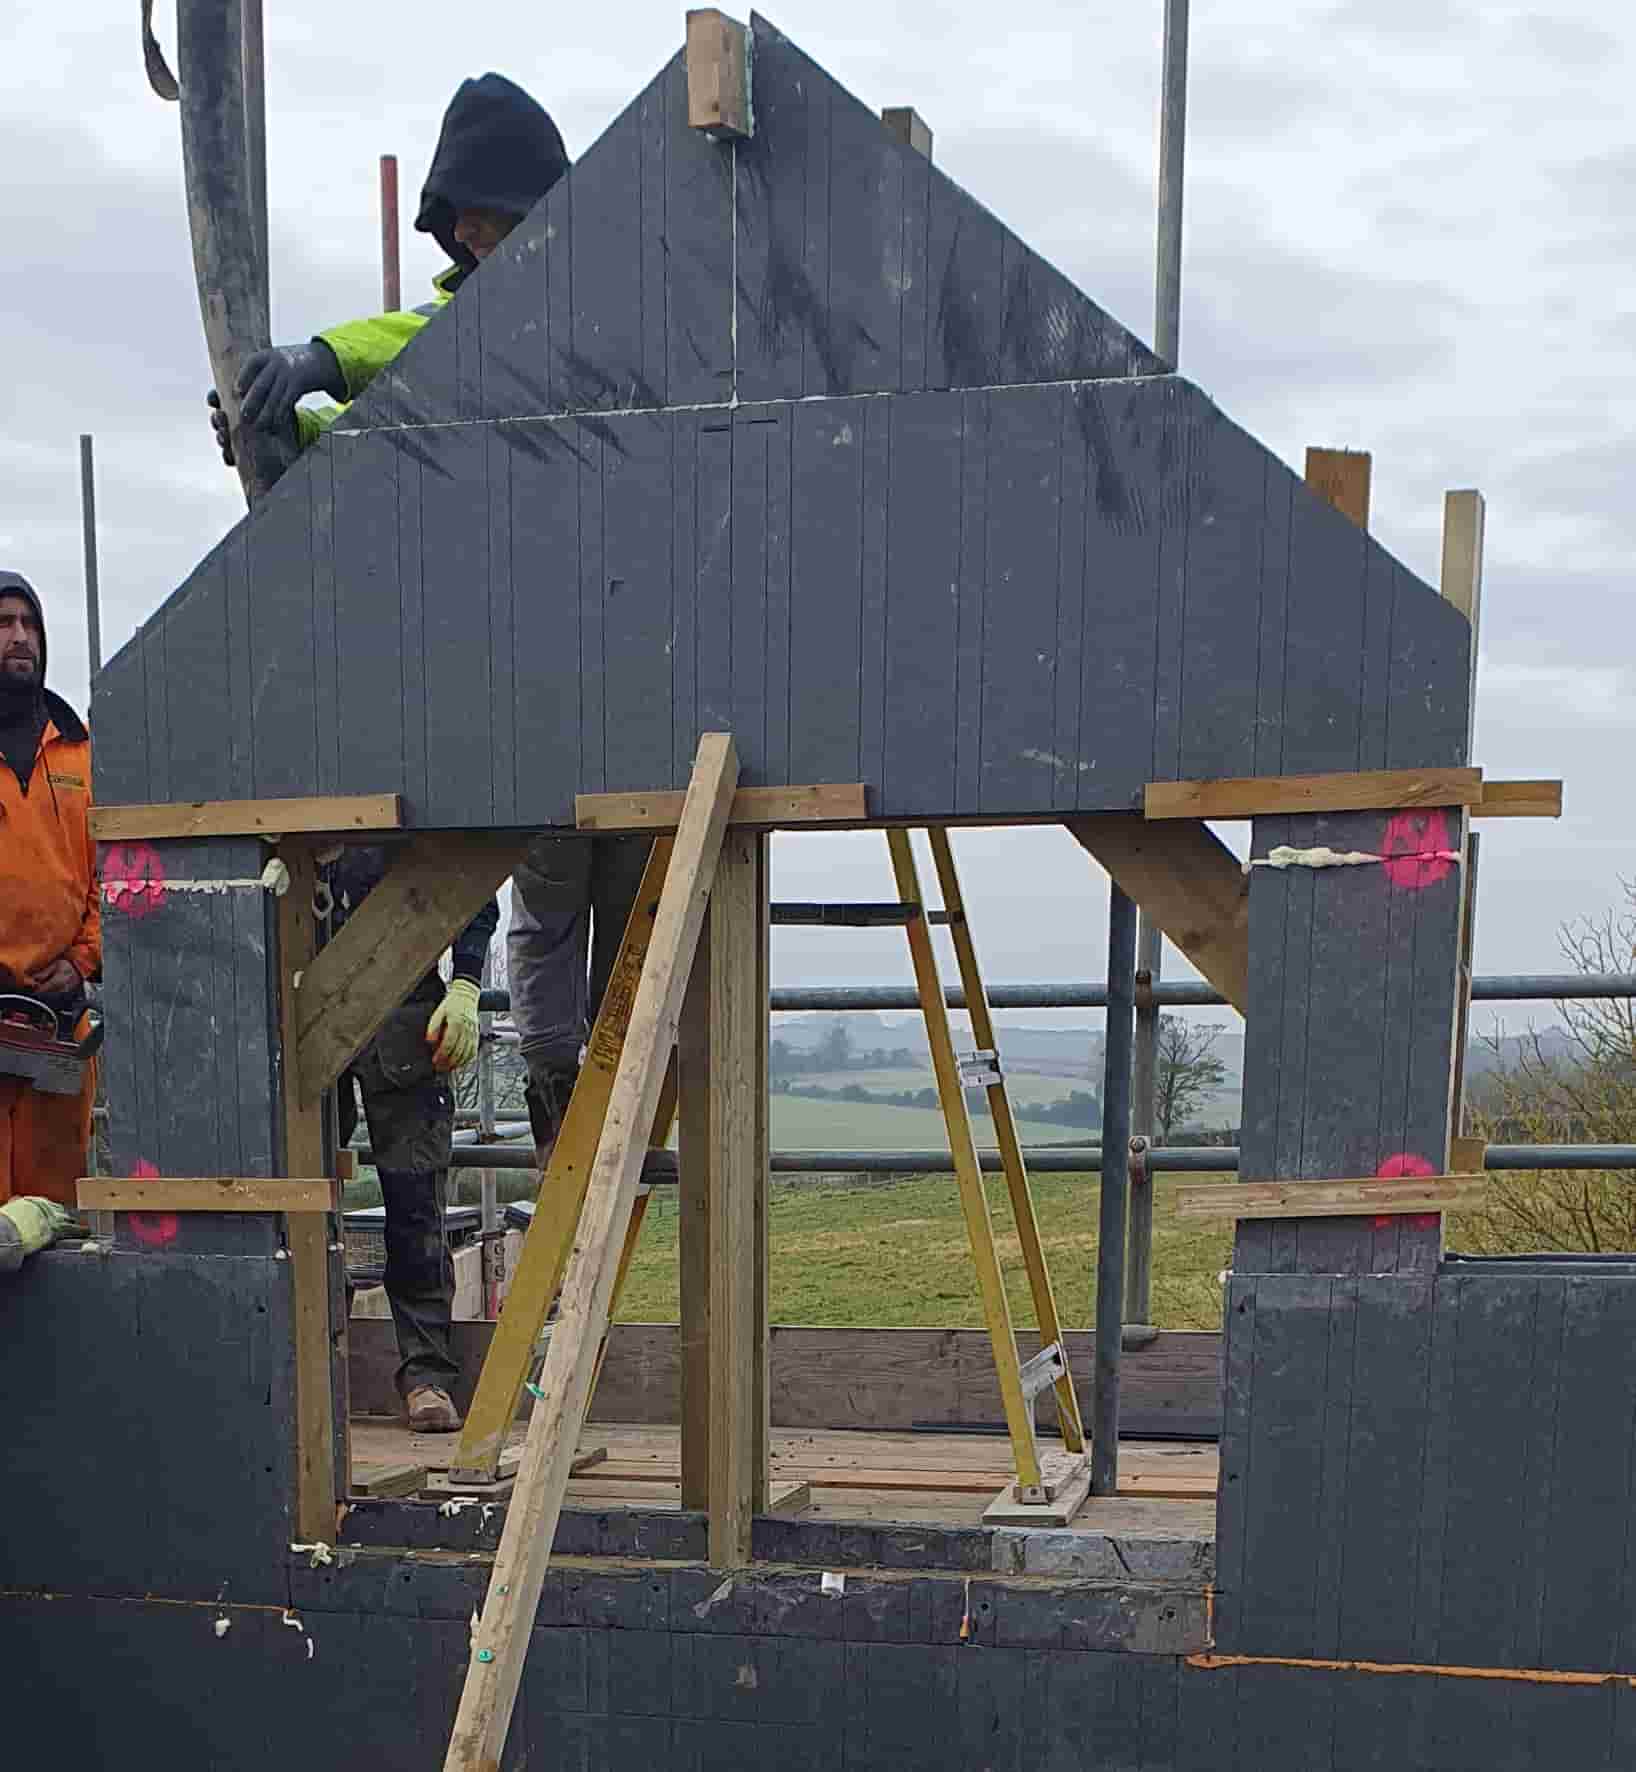
The picture above illustrates how dormer windows can be formed using ICF
Preferred Layout Details.
Wall Height Options
If you are unable to provide 6m between the top of the foundation and the wall plate, the top course of the ICF PolyBloks can be cut down to size using a bandsaw with a metal cutting blade. The ICF PolyBloks can be cut in half to minimise waste and allow wall heights of 5.7m or 6.3m.
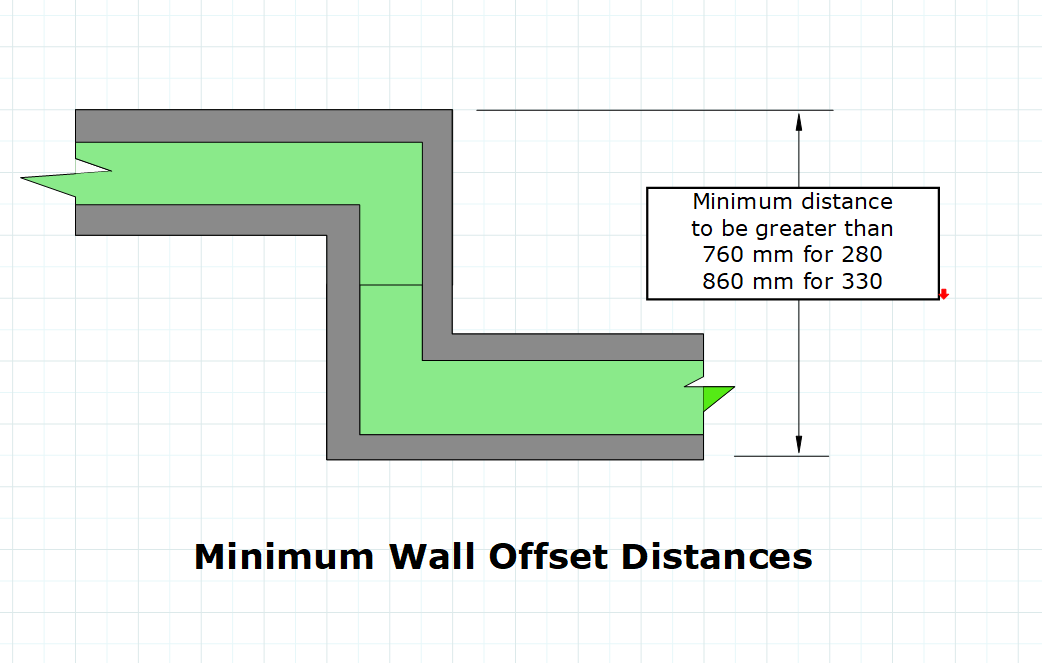
The offset dimensions shown here can be built from standard left and right handed corner blocks. Where the required offset is less, the end webs on the short leg of the corner blocks will need to be removed. The return part of the wall will need to be supported from the top to the bottom of the concrete pour with timber or plywood fixed by external propping.
